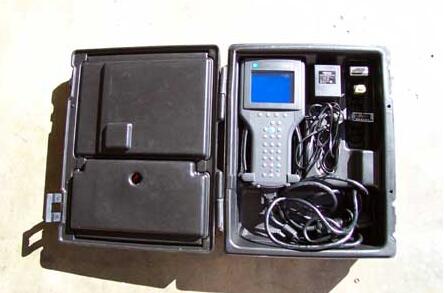
About: How to setup and install GM Tech2 software TIS2000 on a computer
A lot of info I found over at SaabCentral but it is just a giant thread to read through although a lot of the info is on the first page. And a lot doesn’t apply since it’s geared towards Saab (even the 9-7x doesn’t apply, it’s under GM).
So you have a Tech2 scan tool but a lot of the things you would like to do is locked out because you don’t have access to the computer software to allow you to do it. Things like updating PCM’s and modules and anything security related are locked out. If you bought one of the Tech2 clones, it probably came with a CD with the Tis2000 software. If you install it and try to use it, it says that it can’t find the USB security dongle or something like that. That’s because only dealers have those or a clone of one wasn’t included.
First of all, this is old software. It was discontinued in 2008 by GM which means that it works only for vehicles up to model year 2007. It will have PCM and module updates included. For example, I was able to update all of the modules and PCM in my 2006 9-7x even though it had only been a year or two since production and issue of this software. It will also allow you to reprogram a module that you are replacing.
The Tech2 communicates with the computer using a serial port on the computer running Windows XP SP3. This can be a problem if you only have newer computers. Best and easiest scenario is to use an older laptop computer that has a serial port running windows XP. In my setup, I used an old IBM T40 laptop, which is fairly decent processor wise, installed a fresh copy of Windows XP SP3 and used a docking station with it that has a serial port. Laptops that have actual serial ports built in are probably so old that they are too slow or have age and reliability issues. Another solution would be to get a USB to serial port adapter and specify the proper COM port number during the install of Tis2000.
Another possible solution would be to use a virtual environment on a host computer. VMWare is free to use and it has been done from what I read but could be a fairly involved process because of the serial port issue, especially when using a USB to serial adapter. The challenge of communicating from the virtual environment through the real computer’s hardware ports can make it difficult but can be done. I’m not going to discuss this type of installation but the basic software installation and use will be the same. If anyone gets a virtual install working, please post it up.
In some detail, this is what I did. Keep in mind that you should have some computer knowledge and know how to install Windows.
1.Installed a fresh copy of Windows XP SP3. I didn’t bother with updating anything else as far as security updates to Windows or install a virus scan because this computer will never be connected to the Internet or used for anything else.
2.Installed ALL the required drivers until there were no more yellow check marks in Device Manager. I failed to do this at first and caused a lot of headaches later, including a BSOD during software installation.
If you’re using a USB to serial adapter, plug it in now and set it up. Go into Device Manager and make note of the COM port used by the adapter.
3.Install the Professional Diagnostic Tool Tis2000 software from the CD included with the Tech2. During the install, it will ask you to specify the COM port. If you have a serial port on the computer, it’s probably COM 1 or use the one from the USB adapter.
4.Before you can use Tis2000 with your Tech2, you have to make it “think” that there is a dongle connected that authorizes it. You can download the crack below. Follow the read me file for instructions on how to use it.
That’s it. More threads will come explaining how to do stuff with it but this will get you going.
And if you need them:TIS2000 Software & USB Key
Warning: In Tis2000, whatever you do, DO NOT USE THE “SOFTWARE DOWNLOAD” BUTTON! This will retrograde the card in your Tech2 to an old version from 2008.
Some more install info, especially for VM’s, is also available in this thread from obd2tool

Senaste kommentarer